
I purchased a 55 lb at 28-inch draw recurve a few years ago to begin learning traditional archery. I set up an archery range in my back yard, watched Paul Brunner’s videos until I had them memorized, ordered Byron Ferguson’s book “Become the Arrow”, and I practiced more than anybody I knew… and shot very poorly.
But after a few months of practicing a few times a week, I went from never shooting an arrow to being able to shoot five-inch groups at twenty yards. I also hit my first arrow within 2 inches about 90% of the time.
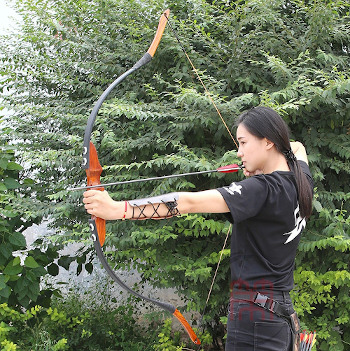
Recurve Aiming Techniques: Sight Picture
I realized the key to it all was to mimic my style when shooting any weapon, even when shooting without sights. After that epiphany, I remembered that the arrow was always under the spot that I wanted to hit in my secondary vision. I decided then to just notice the arrow and its relationship to my eye in reference to what I saw before the arrow left. The arrow became a modified gun barrel and the gap would be determined by the distance of the target.
The method I used to hit the target was to practice a consistent form with my eye directly above the arrow resting on a canted bow.
I then concentrated on the smallest point-of-aim possible.
I started out learning to hit the spot at the closest point possible, then learned to do the same thing at progressively longer distances. Now I aim by determining the vertical distance the end of the arrow is below the target. Between thirty and forty yards I will begin to put the arrow spot on and farther out I put the arrow above the target.
Overview of Howard Hill’s Technique
The “gap” is the distance between your grouping of arrow hits and the point at which you are aiming.
My friend Bill uses a modified version of Howard Hill’s split vision “gap” method. While Hill’s point of aim with split fingers was 50 yards, Bill’s is with three fingers under and a high anchor is 20 yards. This narrows the gap to the point that anybody can execute it quickly. Simply put the gap in as so:
0-15 yards – there’s no gap at all. Just put the top of the arrow shaft (point) on what you want to hit.
15-20 – gap is minor if any – aim middle of the point
20-25 – gap is the bottom of the shaft
30- – gap is one arrow shaft above
40 – gap is two arrow shafts above
50 – too far for where I hunt
Learning the “Gap” Method
Bill read Howard Hill’s book several times and made some adjustments to what worked for him. He put a black 2-inch dot on a pie plate and shot at it from 10 yds with the point on the dot. Then he shot 10 arrow groups at 15, 20, 25, 30, etc. yards and noted the drop at each yardage. After that he simply practiced, shooting 200-300 arrows every week in his backyard.
When shooting a traditional bow there are a few more factors to consider but the effects are the same. During the shot, whilst the arrow is attached to the string, the bow recoils towards the archer. As the string is released and the arrow is driven out of the bow, the riser comes back (recoil) towards the archer. This is why the forward pressure of the bow arm is so important.
Recurve Bow Mechanics
The additional factors involved are that the string has mass which is added to the mass of the arrow being shot, therefore the heavier the string, the slower the shot and the stiffer the arrow. Also, the limbs have mass, which moves forward as the string is released, adding to the forward mass. This forward limb mass is proportional to how much of the limbs moves; the tips of the limbs move the most, with the base of the limbs being stationary and being considered as part of the riser reaction mass. This is one of the reasons why limbs are made with light materials, so as to reduce mass. In reducing mass, they also accelerate more quickly:
(mass of arrow × exit velocity)
- (mass of string × forward velocity)
- (mass of moving limb × forward velocity)
= (mass of riser and fittings × recoil velocity)
This recoil can only be seen when viewed in slow motion from a high-speed video.
It is the forward momentum of the limb and string once the arrow has become detached from the string, combined with the forward pressure from the bow arm, that imparts the forward motion of the bow after the shot. Therefore you can see that by altering the mass of any of the parts, it will consequently alter the velocity of the other parts. This can be utilized when fine-tuning the bow.
Small muscles tire more quickly and are not as strong as big muscles; the skeletal frame can take more load when used efficiently and therefore less muscle is involved, allowing the task to be carried out for a longer duration.
Shooting form and style is about using the body efficiently, allowing the archer to perform every shot consistently with little fatigue.
Finger Placement for Aiming a Traditional Bow
The distance of finger placement above and below the arrow must remain consistent to ensure that the angle of the limbs and the pressure on them is also consistent, keeping the vertical group tighter. I place my fingers on the string so that the index finger is just touching the arrow and the middle finger is below the nock, but not quite touching. As the string is drawn back, the fingers are lightly pressed against the nock with the top finger touching slightly harder than the middle finger. This keeps the angle at the centre of the string as small as possible. The fingers touching the nock ensures that the placement on the string is consistent.
As you draw the bow, feel the vertical alignment of the string in the fingers and try to maintain it throughout the draw and loose. This will enable you to maintain the vertical alignment of the riser throughout the shot, leading to more consistent groups.
Position of the Feet
The rules of the sport state that your feet must be astride the shooting line – lining up your toes with the target is a good start. As you progress and your shooting improves, the position, stability and placement of your feet can be modified to suit your particular requirements. When you stand astride the line, the right foot can be brought closer to the line and the left foot closer to the target at about a shoulder-width apart. This will position you slightly closer to the target. This can give you a good psychological advantage (especially when shooting at 18m). The feet need to be kept facing forward from the body, as this ensures that the feet give the body maximum stability.
Footwear
If you try standing on your bed, you will find that you become less stable and it can become quite tiring standing on a soft surface.
Your footwear for shooting should therefore have a firm, flat base, with the laces tied tightly to help support the foot. Some top archers shoot in footwear that supports the ankle as well, increasing stability. Running shoes are designed for running and have the toes and heels angled to help you run. This decreases the area of shoe in contact with the ground, making you more unstable. Tennis shoes tend to be flatter with a firm base. Some rifle shooters wear special shoes that have a flat base and a thicker sole on the outside to help support the foot for greater stability. Although the weight should be on the front of the foot it needs to be kept steady during the shot. There is a tendency to keep increasing the weight on the front of the foot, leading to a forward overbalance. A simple way to improve the stability of the shot is to shoot from a balance platform. This can easily be made by using a skateboard with the wheels taped so that it will not roll, or by taking a piece of 2in by 3in baton and attaching a piece of plywood centrally over it, which is wide enough to stand on. Using either of these, you can carry out the shot and maintain your shooting position while standing on the platform. This is a good exercise to help maintain your centre of gravity throughout the shot.
Alignment of the Body
To get the body into a position to shoot is quite simple. Stand astride the shooting line facing forwards with your arms at your sides. Keeping the shoulders in place, raise your arms to the side with your palms facing forward, turn your head to the target, bend the right arm towards the face placing the hand under the chin. This is the shooting position.
The torso needs to be kept upright with the backbone straight; the natural tendency is to lean back away from the target. This puts an unwanted curve into the spine that can lead to damage as the discs between the vertebrae are squeezed on one side. Leaning away from the target also makes the clearance of the string from the chest harder to achieve. This usually stems from
the initial days of starting to shoot, as it is quite natural to lean away from a lifted weight. If not corrected, it can be compounded if a bow that is too heavy or has too many stabilizer weights is later used.
This alignment of the shoulders and arms must be kept in the same relationship, whatever the distance and angle of the target. A change of angle is accomplished by inclining the hips. Many archers struggle with the 18m three-spot vertical faces, finding that their scores drop from shooting the single full 18m face. This is usually because the alignment between the arms and shoulders differs with the different angles of the target faces and the change in the dynamics of the bow which results.
Drawing the Bow
Bringing the string to the face prior to the shot needs to be carried out consistently, smoothly and simply. According to Confucius: ‘When you carry something heavy, carry it as though it is light. If you carry something light, carry it as though it is heavy.’ This may seem like odd advice, but when you look at how the muscles work it makes sense. Virtually all the muscles in the body are ‘paired’, which means that there is one muscle or group of muscles to move, for instance the arm in one direction, and then there is the paired set to move the arm in the opposite direction. The opposite muscle to the one doing the work is called the antagonistic muscle.
As I get more proficient I begin to concentrate less on the “gap” and more on the spot and exactly how the arrow flies to the spot. This method is not exclusively gap shooting nor is it exclusively instinctive shooting. It allows me to learn with an “aiming” system yet progress to the “instinctive” style of shooting as I become proficient.
‘The more you shoot, the luckier you will get.’
It is the amount of arrows shot well in a week that will improve your shooting; fitness will enhance the improvements. Your fitness levels will reflect in the scores that you shoot. If you want to get to the top in archery, consider building up to at least the equivalent of 1,000 arrows per week. Listen to your body, there may be slight aches as you change your routine to include exercise but ease off if you are having problems. The reversals and jogging are very good to start with, as reversals encourage you to use the correct shooting muscles, and jogging/walking can be done anywhere, so you are more likely to start doing it.
